Pipeline Editor
The Blue Ocean Pipeline Editor is an easy way for anyone to get started with creating Pipelines in Jenkins. It’s also great for existing Jenkins users to start adopting Pipeline.
|
Blue Ocean status
Blue Ocean will not receive further functionality updates. Blue Ocean will continue to provide easy-to-use Pipeline visualization, but it will not be enhanced further. It will only receive selective updates for significant security issues or functional defects. |
The editor allows users to create and edit Declarative Pipelines and perform actions such as adding stages or configuring parallel tasks, depending on their needs.
When the user completes their configuration, the editor saves the Pipeline to a source code repository as a Jenkinsfile.
If the Pipeline requires further modification, Blue Ocean makes it easy to jump back into the visual editor to modify the Pipeline at any time.
|
Blue Ocean Pipeline Editor limitations
The Blue Ocean Pipeline Editor is a great alternative for Jenkins users, but there are some limitations to its functionality:
|
Starting the editor
To use the editor, a user must first create a Pipeline in Blue Ocean or have at least one existing Pipeline in Jenkins. If editing an existing Pipeline, the credentials for that Pipeline must allow pushing changes to the target repository.
The editor can be launched through the:
-
New Pipeline option from the Blue Ocean dashboard.
-
Branches tab within the Activity view.
-
Edit () in the Pipeline run details view.
Navigation bar
The Pipeline editor includes the standard navigation bar at the top, with a local navigation bar below it. The local navigation bar includes:
-
Pipeline Name - This also includes the branch name.
-
Cancel - Discards changes made to the pipeline.
-
Save - Opens the save Pipeline dialog.
Pipeline Settings
By default, the pane on the right side of the editor displays the Pipeline Settings. Selecting an existing stage or adding a stage displays the stage configuration pane instead. To navigate back to the Pipeline Settings pane, select any empty space in the background of the editor. Within the Pipeline Settings pane, there are two sections that are configurable.
Agent
The Agent section controls which agent the Pipeline uses. This performs the same process as the agent directive. The Image field allows users to configure which container image runs when the Pipeline is active.
Environment
The Environment section allows users to configure environment variables for the Pipeline. This is the same process as the environment directive.
Stage editor
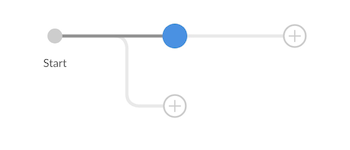
The left pane displays the stage editor UI, which allows users to create or add stages of a Pipeline.
-
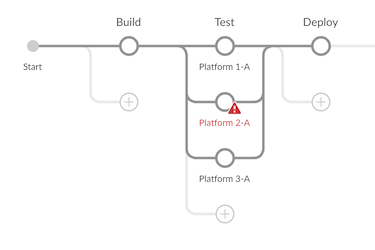
To add a stage to the Pipeline, select the icon to the right of an existing stage. Selecting the icon below an existing stage adds a parallel stage.
-
To delete unwanted stages, use the more menu in the stage configuration pane.
After setting the stage name and saving, the name displays above the stage. Stages that contain incomplete or invalid information display a . Pipelines can have validation errors during editing, but saving is blocked until the errors are fixed.
Stage configuration
Selecting a stage in the editor displays the Stage Configuration pane on the right side of the screen. Here, you can modify the name of the stage, delete the stage, and add steps to a stage.
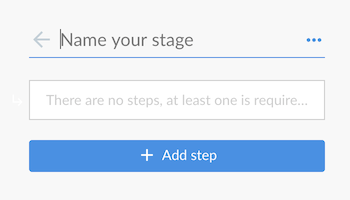
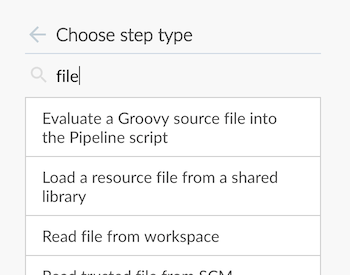
The name of the stage can be set at the top of the stage configuration pane. The more menu, represented by three dots to the right of the stage name, allows users to delete the currently selected stage. Selecting Add step displays the list of available step types. After selecting a step type, the page displays the step configuration pane.
Step configuration
This pane display is based on the step type selected, and contains the necessary fields or controls.
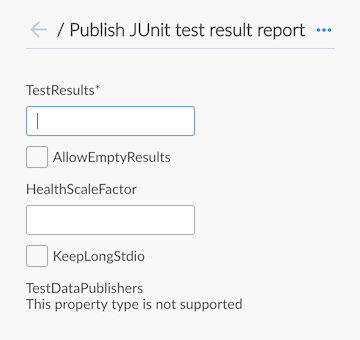
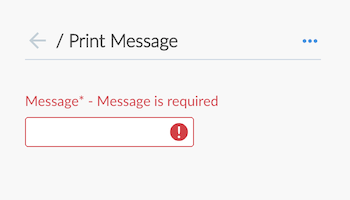
Be sure to provide a strong name for the step, as the name retains its original configuration. Deleting the step and recreating it is the only way to provide a different name. The more menu, represented by three dots to the right of the step name, allows users to delete the current step. Fields that contain incomplete or invalid information display a . Any validation errors must be addressed before saving.
Save Pipeline dialog
Changes to a Pipeline must be saved in source control before running. The Save Pipeline dialog controls the saving of changes to source control.
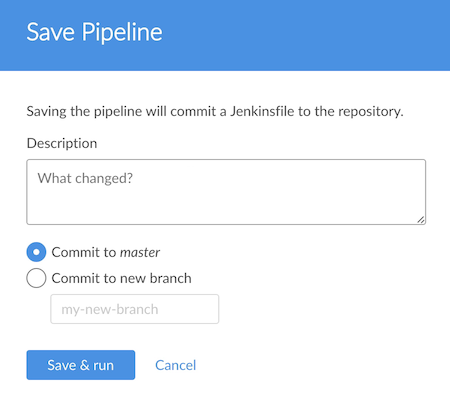
You can optionally enter a description of the changes before saving. The dialog also provides options for saving changes to the same branch or creating a new branch to save to. Selecting Save & run saves any changes to the Pipeline as a new commit, starts a new Pipeline run based on those changes, and navigates to the Activity view for this pipeline.